📱React Native — Lists with swipe sideways for action
How to create contextual menus for lists

Swipe actions allows to easily access extra options in lists in React Native apps. Users can reveal hidden choices by swiping sideways on list items. This keeps the list looking normal until users want to do something extra.
Whether it’s archiving an email or deleting a photo, swipe actions let users interact quickly and easily. They turn plain lists into interactive tools, making the app experience even better.
In this tutorial we’re having a look at such an effect in a list of arbitrary items. Let’s go!
Step 1️⃣ — Set the stage
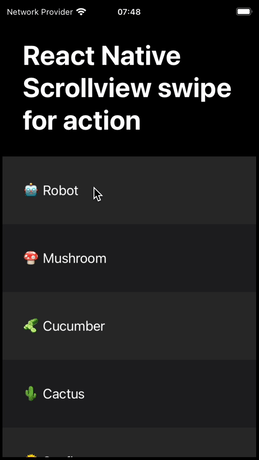
The first thing to do is to get a list in place. To do so we basically need an App with two components: a ScrollView and a ListElement

Listitem.tsx
const styles = StyleSheet.create({
  item: {
    height: 100,
    justifyContent: 'center',
    width: '100%',
  },
  itemEven: {
    backgroundColor: '#262628',
  },
  itemOdd: {
    backgroundColor: '#1d1d20',
  },
  text: {
    color: 'white',
    fontSize: 20,
    marginLeft: 30,
  },
});

const ListItem = ({odd, text}: Props) => (
  <View style={[styles.item, odd ? styles.itemOdd : styles.itemEven]}>
    <Text style={styles.text}>{text}</Text>
  </View>
);
and the rendering part of App.tsx
// ...
<SafeAreaView style={backgroundStyle}>
  <ScrollView
    contentInsetAdjustmentBehavior="automatic"
    style={backgroundStyle}
    ref={scrollViewRef}>
    <View>
      <Text style={styles.title}>
        React Native Scrollview swipe for action
      </Text>
    </View>
    <ListItem text="🤖 Robot" scrollViewRef={scrollViewRef} />
    <ListItem odd text="🍄 Mushroom" scrollViewRef={scrollViewRef} />
    <ListItem text="🥒 Cucumber" scrollViewRef={scrollViewRef} />
    <ListItem odd text="🌵 Cactus" scrollViewRef={scrollViewRef} />
    <ListItem text="🌻 Sunflower" scrollViewRef={scrollViewRef} />
    <ListItem odd text="🐚 Seashells" scrollViewRef={scrollViewRef} />
    <ListItem text="🌛 Mr. Moon" scrollViewRef={scrollViewRef} />
    <ListItem odd text="🪐 Saturn" scrollViewRef={scrollViewRef} />
    <ListItem text="🚧 Road closed" scrollViewRef={scrollViewRef} />
    <ListItem odd text="🏖️ La playa" scrollViewRef={scrollViewRef} />
    <ListItem text="🛸 Flying saucer" scrollViewRef={scrollViewRef} />
  </ScrollView>
</SafeAreaView>
// ...
Step 2️⃣ — Lights, camera, and action
Second thing to do is to make the list elements horizontally draggable. Dragging is made possible by adding a panHandler to the ListItem component. It’s valuable for the sake of learning to have a look at the panHandler API. Since I am lazy I ask ChatGPT for the code. What’s also needed, in addition to dragging, is a release callback, when the user ends the swipe gesture. Here we want the item to animate back to its starting position. Be sure to be instructive when asking ChatGPT for the code to make its suggestions as accurate as possible.

And the key parts of the code
  // ...
  const pan = useRef(new Animated.ValueXY()).current;
  const panResponder = useRef(
    PanResponder.create({
      onStartShouldSetPanResponder: () => true,
      onPanResponderMove: (_event, gestureState) => {
        pan.setValue({x: gestureState.dx, y: 0});
      },
      onPanResponderRelease: () => {
        Animated.spring(pan, {
          toValue: {x: 0, y: 0},
          useNativeDriver: false,
        }).start();
      },
    }),
  ).current;

  // ...

  return (
    <Animated.View
      style={[
        styles.item,
        odd ? styles.itemEven : styles.itemOdd,
        {transform: [{translateX: pan.x}, {translateY: pan.y}]},
      ]}
      {...panResponder.panHandlers}>
      <Text style={styles.text}>{text}</Text>
    </Animated.View>
  );
Step 3️⃣ — Setting some boundaries
Next up is adding a threshold that prevents users from dragging the list item past at a certain point. I.e. the user should only be able to reveal the options and not drag the list element further than needed.

This is easily accomplished by adding a threshold to the move callback handler. If the user drags past this threshold, we simply clamp the value.
  // ...
  const THRESHOLD = 80;
  // ...
  onPanResponderMove: (event, gestureState) => {
    if (gestureState.dx > THRESHOLD) {
      pan.setValue({x: THRESHOLD, y: 0});
    } else if (gestureState.dx < -THRESHOLD) {
      pan.setValue({x: -THRESHOLD, y: 0});
    } else {
      pan.setValue({x: gestureState.dx, y: 0});
    }
  },
  // ...
Step 4️⃣ — A splash of color
Next up is animating the background color

To animate the background we need an interpolation. This step is too a copy and paste exercise from ChatGPT. This is what the code looks like after picking up the suggestion from ChatGPT:
  // ...
  const backgroundColor = pan.x.interpolate({
    inputRange: [-THRESHOLD, 0, THRESHOLD],
    outputRange: ['#409550', '#000000', '#bB4941'],
    extrapolate: 'clamp',
  });
// ...
And the JSX applying the interpolation to the background element
  {/* Background */}
  <Animated.View style={[styles.background, {backgroundColor}]} />
  {/* List item */}
  <Animated.View
    style={[
      styles.item,
      odd ? styles.itemEven : styles.itemOdd,
      {transform: [{translateX: pan.x}, {translateY: pan.y}]},
    ]}
    {...panResponder.panHandlers}>
    <Text style={styles.text}>{text}</Text>
  </Animated.View>
Step 5️⃣ — Icons
Let’s add some icons to make the whole thing a bit more realistic. For icons let’s use Material UI icons, which are free to use. To use these SVGs in React Native, first we’ll need to 1. install react-native-svg and 2. convert the SVG code. I converted the ones used in this tutorial by hand. There are automatic options as well, e.g. ChatGPT, or other tools online. The format is quite similar so conversion is quite straight forward. To install the package run the following commands:
# npm
npm install react-native-svg
# or yarn
yarn add react-native-svg
Here are the icons:
The RN Svg markup, Delete.tsx.
const Delete = () => (
  <Svg height="30" viewBox="0 0 24 24" width="30">
    <Path d="M0 0h24v24H0z" fill="none" />
    <Path
      d="M6 19c0 1.1.9 2 2 2h8c1.1 0 2-.9 2-2V7H6v12zM19 4h-3.5l-1-1h-5l-1 1H5v2h14V4z"
      fill="#fff"
    />
  </Svg>
);
and the Listitem.tsx.
  // ...
  <Animated.View style={[styles.background, {backgroundColor}]} />
  <View style={styles.deleteIcon}>
    <Delete />
  </View>
  // ...
And the result
Step 6️⃣ — Rubber-banding
An always nice effect when dragging is the rubber-banding effect. Rubber-banding is implemented by adding a decay when the user drags past the threshold. If the user drags past the threshold we set the distance to the square root of the relative change in movement.
  // ...
  onPanResponderMove: (_event, gestureState) => {
    if (gestureState.dx > THRESHOLD) {
      const newX = THRESHOLD + Math.sqrt(gestureState.dx - THRESHOLD);
      pan.setValue({x: newX, y: 0});
    } else if (gestureState.dx < -THRESHOLD) {
      const newX = -THRESHOLD - Math.sqrt(-THRESHOLD - gestureState.dx);
      pan.setValue({x: newX, y: 0});
    } else {
      pan.setValue({x: gestureState.dx, y: 0});
    }
  },
  // ...
And the rubber-banding in action.
Step 7️⃣ — Keep it opened
Let’s now change the release handler to use half the threshold to determine whether to show the option and keep it shown or not.
  // ...
  onPanResponderRelease: (_event, gestureState) => {
    if (gestureState.dx > THRESHOLD / 2) {
      release(THRESHOLD);
    } else if (gestureState.dx < -THRESHOLD / 2) {
      release(-THRESHOLD);
    } else {
      release(0);
    }
    scrollViewRef.current?.setNativeProps({scrollEnabled: true});
  },
  // ...
Step 8️⃣ — Synchronizing lists
One of the more trickier parts of this effect is to distinguish between horizontal and vertical scrolling. Should the user start a horizontal swipe gesture we then want to restrict the list from scrolling vertically. It’s good UX to keep the two cases separated for the sake of clarity between the two interactions. First let’s have a look at the case we want to prevent

To synchronize the different interactions, we can pass a ref to the ScrollView to our dragging logic. With the ref we can lock scrolling in the ScrollView while the user is operating the Swipe Actions. What we need is to make sure the movement is horizontal, then we lock scrolling in the List. Here’s what it looks like in code
  // ...
  onPanResponderMove: (_event, gestureState) => {
    if (Math.abs(gestureState.dx) > Math.abs(gestureState.dy)) {
      scrollViewRef.current?.setNativeProps({scrollEnabled: false});
    }
    // ...
  },
  onPanResponderRelease: (_event, gestureState) => {
    scrollViewRef.current?.setNativeProps({scrollEnabled: true});
    // ...
  },
  // ...
And the result

That’s it! Thanks for reading thus far and good luck with your Swipe Actions. If you like articles like this one, be sure to clap, follow, and share. Cheers!
You can find the code here: https://github.com/ainalem/SwipeSidewaysForAction
Stackademic 🎓
Thank you for reading until the end. Before you go:
- Please consider clapping and following the writer! 👏
- Follow us X | LinkedIn | YouTube | Discord
- Visit our other platforms: In Plain English | CoFeed | Venture | Cubed
- More content at Stackademic.com